|
Decibel Dungeon
|
|
Like many before me, I eventually got tired of the sound of my PC. Having it sat on the desk at ear level didn't really help and I decided it was time to do something about it.
|
|
I had noticed how PC's at floor level, or on the lowest shelf of a PC desk didn't seem so loud. My mother's PC had a fairly noisy CPU cooler and case fan, but being practically at floor level, I didn't notice it as much as my own PC. The trouble was, I didn't have anywhere convenient to put my PC other than in the foot well of my desk and that would have meant nowhere to put my feet!
|
|
When I started using my PC as a music server, I realised that it was time to try and make the damn thing a lot quieter. I Googled around and found plenty of information on the subject, most of which involved some investment in items like near-silent CPU coolers, hard-drive enclosures, and case fans. But I didn't have much money to throw at the project so I drew up my own plan.
|
| Site menu
Page menu
|
|
|
A friend who works with computers warned me about putting my PC in a 'cupboard' and I realised that I needed to think about this very carefully. The plan for the PC was to replace the stock AMD cooler with a quieter one. I found one for about 6 GBP at Ebuyer and decided to give it a try. Other than that, I would add a couple more 12 cm fans. I wanted plenty of air-flow through the case and knew it would involve hacking it about quite a lot. Rather than experiment with my expensive Chieftec Dragon case, I resolved to buy a cheap case instead. It didn't matter what it looked like as it wasn't going to be visible. Once again Ebuyer came up with the goods in the shape of a budget case for 12 GBP.
|
|
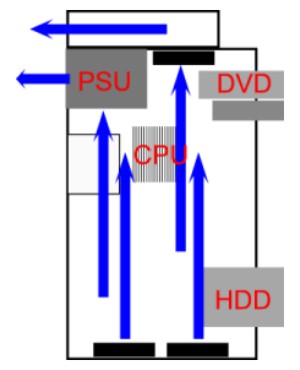
The next thing to do was work out the best way of keeping everything as cool as possible which meant optimising the air-flow through the case. As warm air rises I decided to bring in fresh air via the base and expel it through the top of the case (as well as via the PSU). This is what I drew up.
|
|
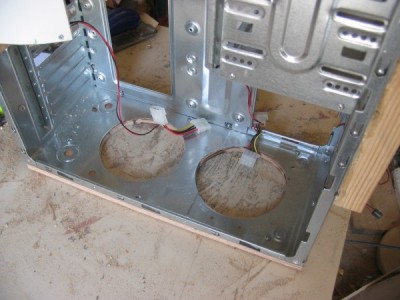
Those are two 12 cm fans attached to the bottom of the case. I decided to use Ebuyer cheapo fans. Although not as quiet as some of the branded ones they cost only one pound compared to six, so I decided to take a chance on them. I had already discovered that when run at about half voltage, they are quiet enough for me! Of course this involved cutting two 12 cm holes in the base of the case that was already quite flimsy (well what do you expect for that price?). So I also planned to add some 10mm ply to the base to strengthen it before I cut the holes.
|
|
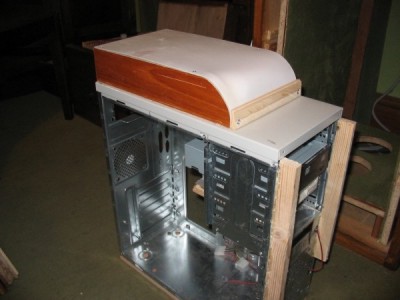
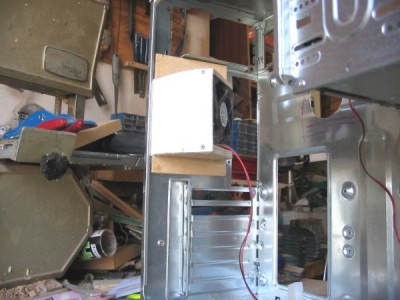
Another 12 cm hole would be cut in the top of the case and then some kind of ducting made to carry the exhausted air to the rear of the case (and the rear of the pedestal). The bottom pair of fans would be run in series so each fan saw 6 volts instead of 12. The top fan would be run at 7 volts by using the 12 and 5 volt feeds. I thought this would probably be sufficient but didn't want to take any chances. So I designed a cradle for an 8 cm fan to blow in fresh air from the rear of the case. I wanted to angle the fan such that it blew air onto the CPU cooler. I've never understood why those rear fans just blow air straight across the half of the case where there is nothing to cool! The 8 cm fan would also be switched so that I could turn it on of off as required.
|
|
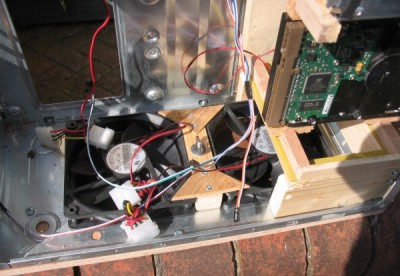
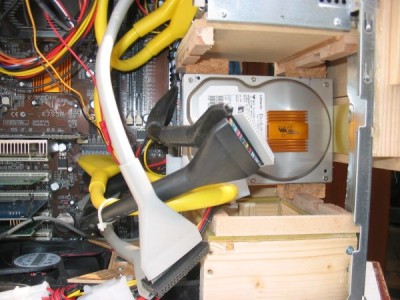
I then turned my attention to the hard drive(s). I reckon a hard drive is best positioned vertically such that air can flow up both 'sides'. I therefore decided to do away with the 3.5 inch metal housing, and build my own HDD rack. This would be basically four rails with slots in them. Cork blocks would be fitted to the hard drive that would then be slid the into the cutouts in the rails. It's far easier to understand this from the picture of the mock up.
|
|
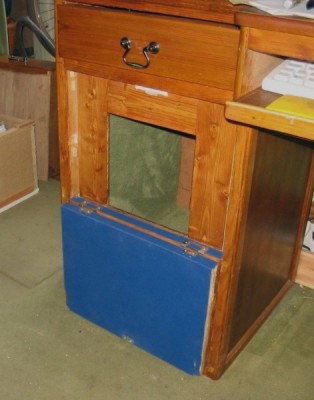
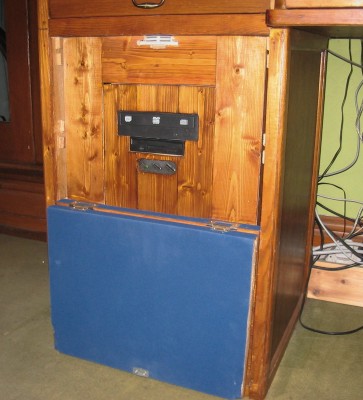
As regards the desk, I planned to remove the three drawers, make some false sides and a small platform to raise the PC case such that there would be an equal space above and below it. I planned to built a front with an opening bit to access the drives etc, and finally cut an aperture in the rear of the pedestal to allow the case to poke out.
|
| Site menu
Page Menu
|
|
|
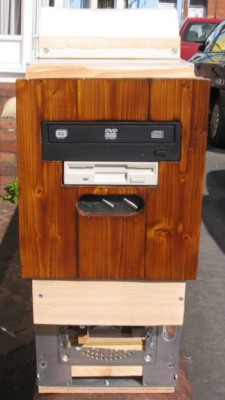
Having ordered the computer bits, I set about the desk. I made up a front panel in two halves that hinged together and allowed the top half to fold down out of the way. This provided access to the power switch, DVD and floppy drive. I built it out of scrap chipboard and then 'veneered' it in real wood (cheap cladding) before staining it to match the desk.
|
|
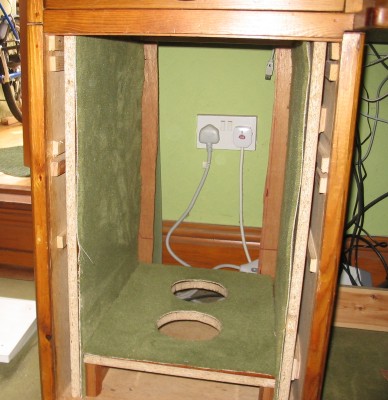
Two false sides were then made up and carpeted to help reduce the noise. A small raised platform was constructed that would fit snuggly between the false side panels. I cut out the apertures to correspond with the case fans. In fact, working out where everything would go together was the hardest part of this whole job! Finally on the desk, I cut out an aperture from the rear panel.
|
|
The first job on the case was to add the ply to the base and cut the two apertures for the 12 cm fans.
When the case arrived it was a little smaller than I had imagined. I soon realised that I was going to have problems getting that 12 cm fan in the top panel. The only way round it was to move the DVD drive forward, such that it was proud of the front of the case by about 30mm. By placing the DVD drive in the second slot down, I then had enough room to fit the fan. If the drive had not been moved forward, it would also have fouled the memory sticks on the motherboard.
|
|
I then cut a hole in the top of the case for the fan, and bolted it in position. A couple of lengths of timber and some bendy plastic sheet provide the materials for the ducting. I wanted to provide some sort of wave-guide for the expelled air to guide it to the rear, so the duct has a curve on it where it goes over the fan.
|
|
I then made up a cradle for the floppy drive as I had cut out the rack for the 3.5 inch drives. This was nothing more than a piece of 6mm plywood and some aluminium angle with holes drilled in them to allow the drive to be screwed in.
|
|
There was more cutting of the case, first in the area at the lower front, where I realised the hard drive(s) would need to protrude through in order not to foul parts of the motherboard. The I removed the fan grill from the rear of the case. All this cutting was quite a delicate job on such a flimsy case, and at times I needed to screw bits of scrap timber to the case to keep it rigid while I hacked away with the jigsaw or file.
|
|
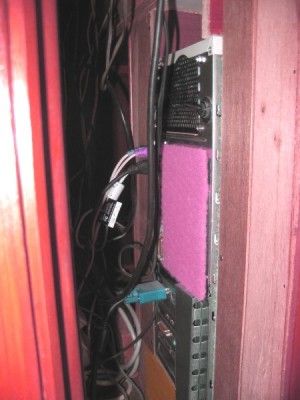
The next job was to make up the cradle for the rear fan. Again, that thin bendy plastic came in useful, this time with some thin MDF. The fan sits nicely in the cradle held in place with a strip of elastic. This fan cradle also provides some extra rigidity at the rear of the case. I also added a switch in the rear of the case next to the cradle.
|
|
Next came the hard drive cradle. The top part of the cradle is fitted to the underside of the 5.25 drive rack. The lower part is designed to sit astride, and over, one of the 12 cm fans on the base.
|
|
Finally, I built a new front fascia out of thin ply,'veneered' with some more cladding, and again stained to match the desk. My router had just packed up so cutting out the apertures for the DVD drive, floppy drive, and switches etc was rather hit and miss. But I figured most of this work wouldn't ever be seen so I didn't worry too much.
|
|
I cut out the part of the plastic fascia that came with the case that housed the switches and LEDs. This was then screwed to the rear of the wooden fascia.
|
|
|
| Site menu
Page menu
|
|
|
When the computer bits arrived it was time to put everything together and hope that all my plans would come to fruition. I did have the consolation that everything was reversible but I still kept my fingers crossed. I knew it that it would be a very tight squeeze to get it all in.
|
|
Having removed everything from the existing case, I swapped the stock AMD cooler for the Arctic Cooling AC-CL Copper Lite (Copper Silent 3) Socket A Cooling Fan. This job went fairly easily. They even supply a syringe of thermal paste to put between the heatsink and CPU.
|
|
Next I screwed the motherboard into the new case before installing the PSU, DVD and floppy drives. Having connected all the wires for switches, LEDs, speaker etc, I then fitted the two 12 cm drives to the bottom of the case.
|
|
The 8 cm fan then needed to be modified by cutting the positive wire and adding some receptacles so that it could be connected to the switch terminals. The fan cradle was then screwed to the back of the case. A dust filter was then fitted consisting of a kitchen scouring pad held in place by Velcro. I also use a similar arrangement on the inlet to the duct supplying air to the fans in the bottom of the case.
|
|
The lower half of the hard drive cradle was then put in position (it needs no fixing). The cork blocks were then screwed to the hard drive that was in turn slid into the cradle. It is a tight fit and there is no need for screws etc.
|
|
I had already made up a lead to run the two 12 cm fans in series so all that was left was to connect up the power connections, IDE cables and CD lead to the sound card and I was ready to try power up.
|
| Site menu
Page menu
|
|
|
Well, there wasn't much to test here. I placed the PC on blocks of wood to raise it off the desk and did a quick visual inspection. Apart from finding that some wires were fouling the CPU cooler fan in its open cradle, everything else looked good so tied back the offending wires and then applied power. I had moved the sound card to a different slot so it didn't come to close to one of the 12 cm fans at the bottom of the case and I was asked to re-install it. Then I left the PC running for a while to check the temperatures were OK. Then, satisfied that all was well, I placed the PC inside the pedestal, fitted in the front panel, and connected everything at the rear.
|
| Site menu
Page menu
|
|
|
When I turned the PC on for the first time in the pedestal I thought that there must be a problem. But putting my ear close to the rear of the desk I could hear the fans spinning away. In my chair, the noise was hardly audible! It was an eerie experience for sure having been so used to the sound of the PC sitting on the desk for many years! It's not perfectly silent but it is more than quiet enough for me, and very impressive for an outlay of less than 25 GBP. But of course the big question is what are the temperatures like.
|
|
I had made notes of the temperatures before I made the changes. Before I used a single 12 cm fan in the side of the case, and situated so that it blew air directly on to the CPU cooler. The fan ran full power at 12 volts but I also ran it in series with an 8 cm fan in the rear of the case. I measured the temperatures with Motherboard Monitor (MBM5) and a remote sensor on a room thermometer. Here are the figures:
|
&
|
CPU
|
Case
|
|
Fan at 6v
|
+21C
|
+6.5C
|
|
Fan at 12v
|
+18C
|
+5C
|
|
Now
|
+17C
|
+3C
|
(temperatures quoted are degrees C above room temperature (normally 17-25C) and without the rear 8 cm fan running.
|
|
You can see from the above that not only is my PC much quieter but it is also running slightly cooler. I'm also sure that with the 12 cm fan blowing air over the hard drive(s) they are running cooler too!
|
|
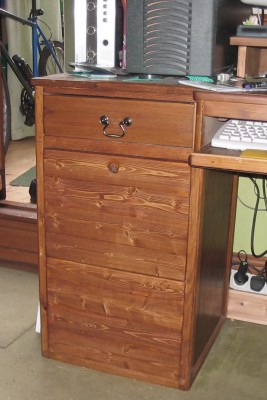
Conclusion? Quite a lot of work modifying that case but it seems to have paid off! I've lost three drawers but gained some more space on my desk top (the real one that is). I'm going to add a carpeted panel to the wall at the rear of the PC and that should absorb even more of the sound but even as it is, I am very happy! Oh yes, and I've got the 8cm fan if I ever need it during the height of the summer!
|
| Site menu
Page menu
|
|
|
